The restoration of a 1980's Williams Defender arcade machine
Building a Midway Space Invaders Deluxe test harness
There are various articles on testing and the pinout for Midway Space Invaders online, however none of them clearly show how to build a simple test harness for Space Invaders Deluxe
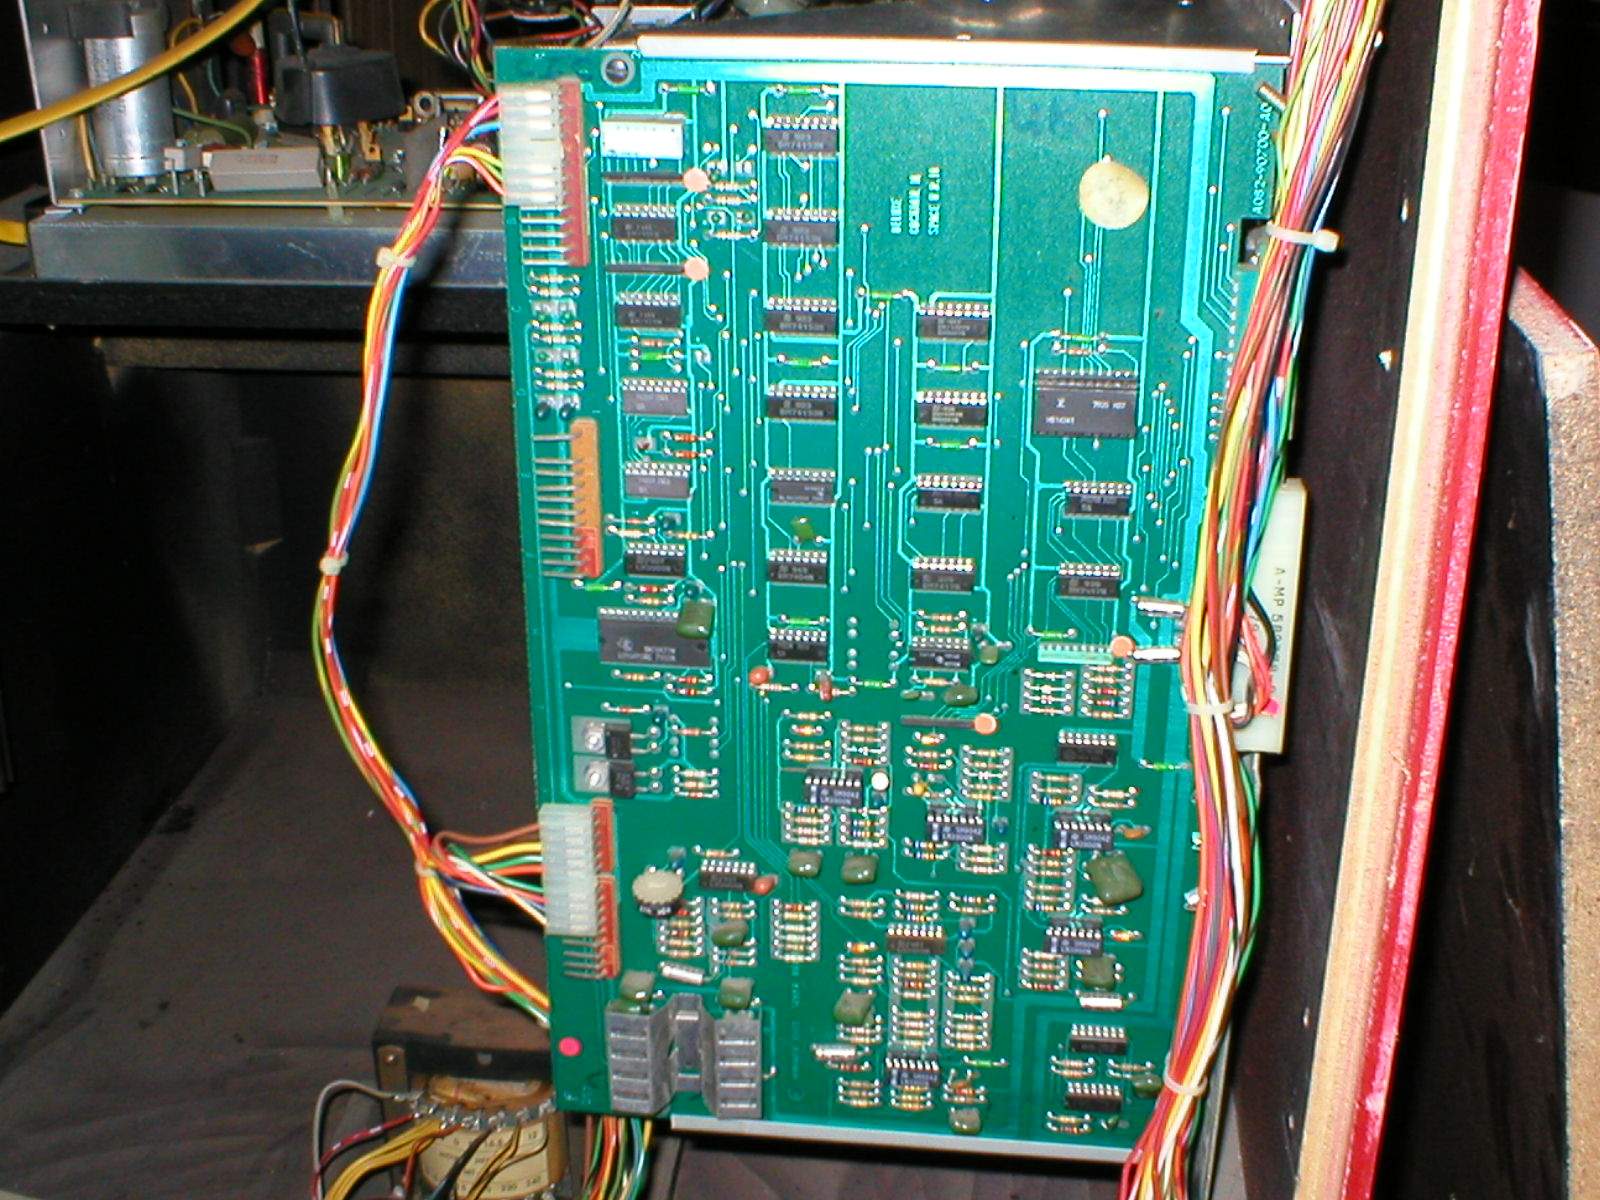
Although the motherboard of both Midway Space Invaders and Midway Space Invaders Deluxe is the same (bar different program ROMs obviously) the sound boards are considerably different and a little confusing.
So here’s how to build our test harness.
Ingredients:
1 x 18 pin motherboard connector (£1.84 from eBay)
1 x phono connector (I stole one from an old HiFi phono lead)
5 x connector wires (about 2 foot long)
1 x switching power supply (£15 from eBay)
1 x insulated small spade connector
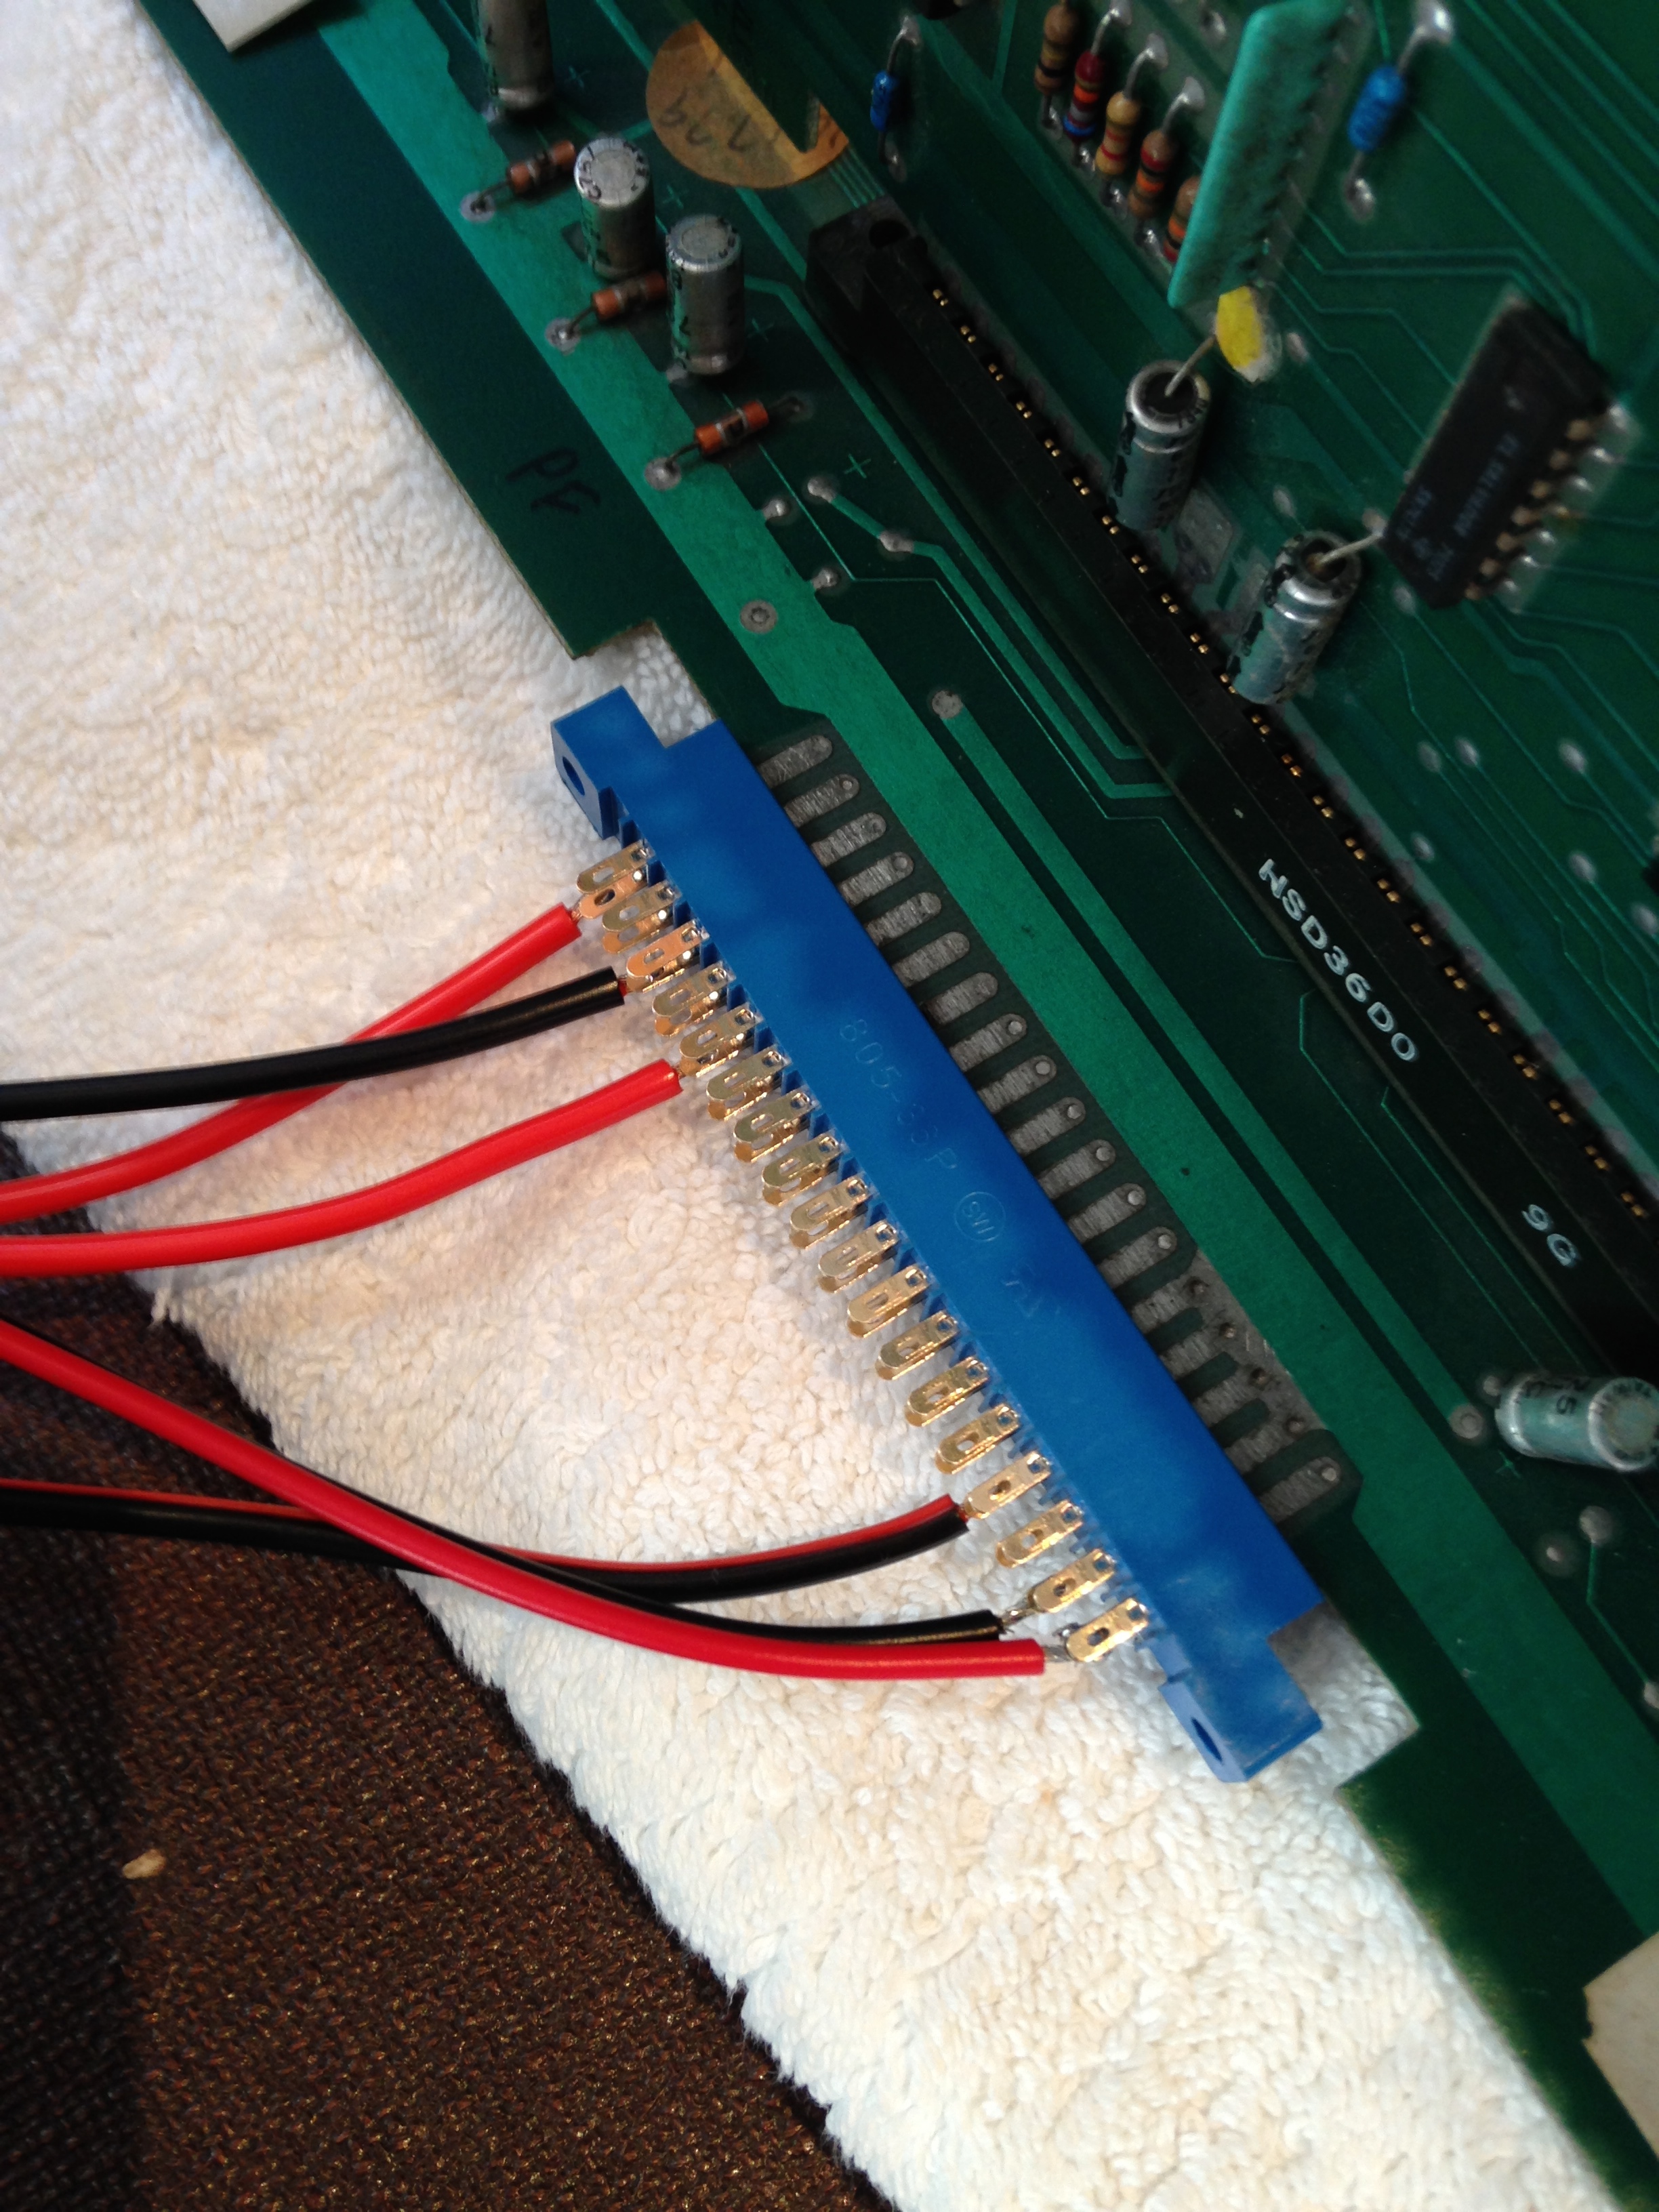
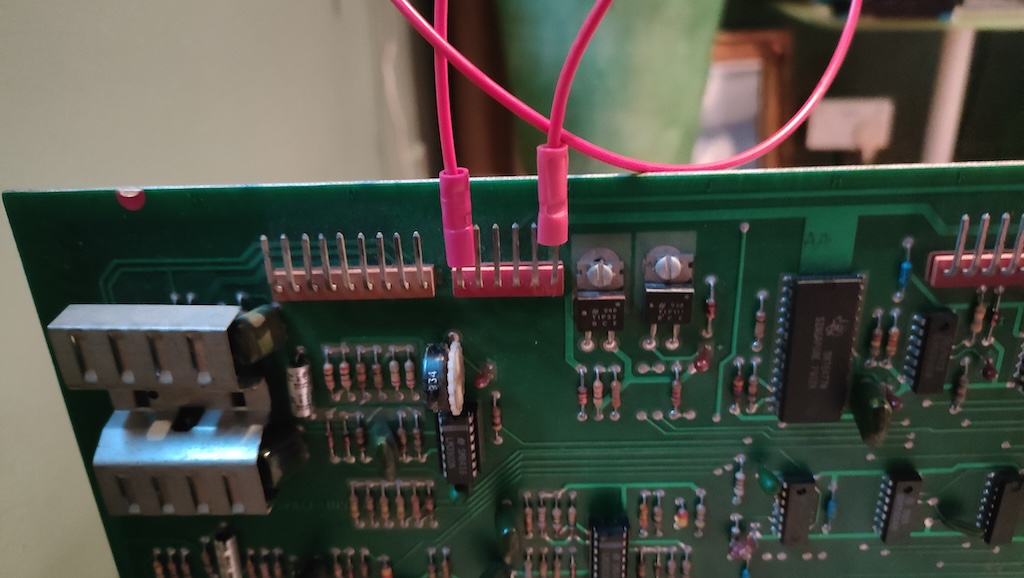
1. Strip and solder the 5 x connector wires to the 18 pin connector
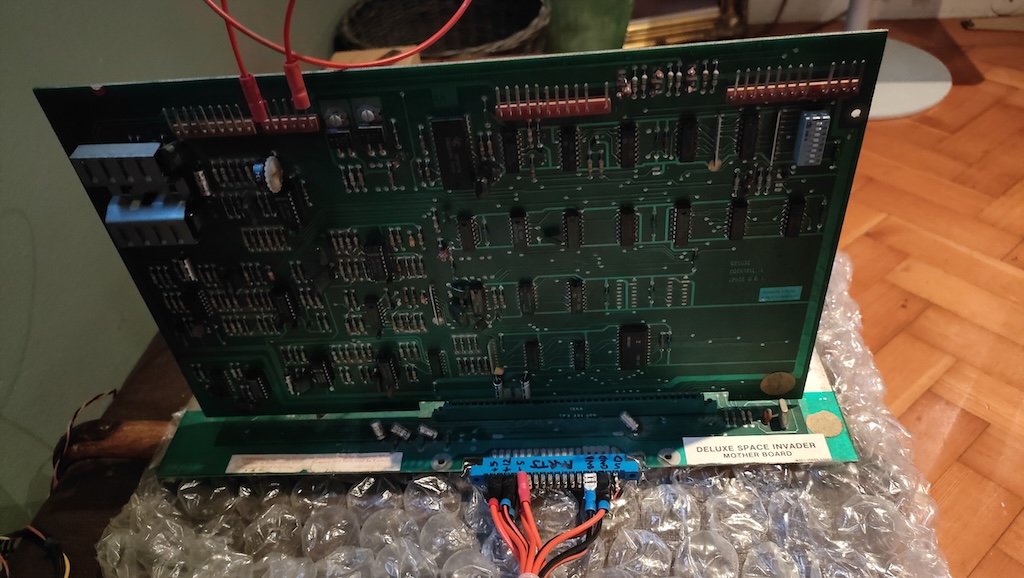
Blank Motherboard connector
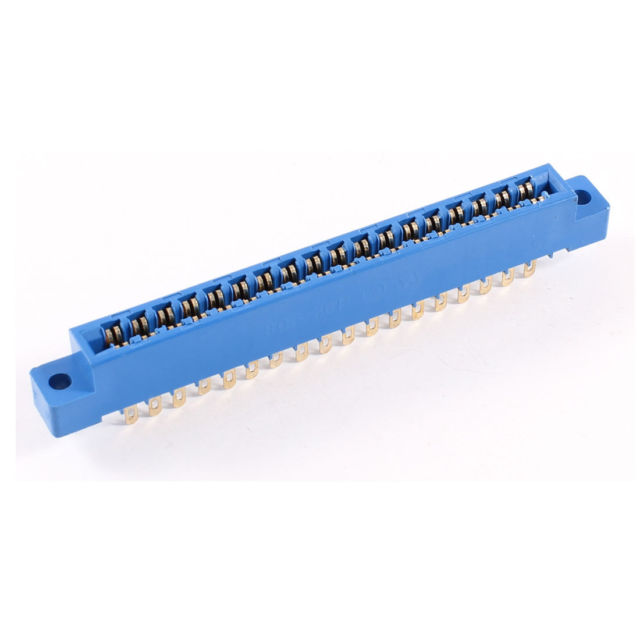
Interestingly as all of the top and bottom contacts on the Motherboard are punched through from top-to-bottom, you only need to wire up one side of the connector as it automatically connects to the other side of the Motherboard.
Wiring is (left to right looking at the Motherboard, with 1 on the left, and 18 on the right) and I’ve deliberately used every two where I can to allow more room for soldering
18 – Phono +ve (inside pointy bit of phono plug)
17 – Phono -ve (outside ring of phono plug)
16 –
15 –
14 – Ground
13 –
12 –
11 –
10 –
09 –
08 –
07 –
06 –
05 – -5V DC
04 –
03 – +12V DC
02 –
01 – +5V DC
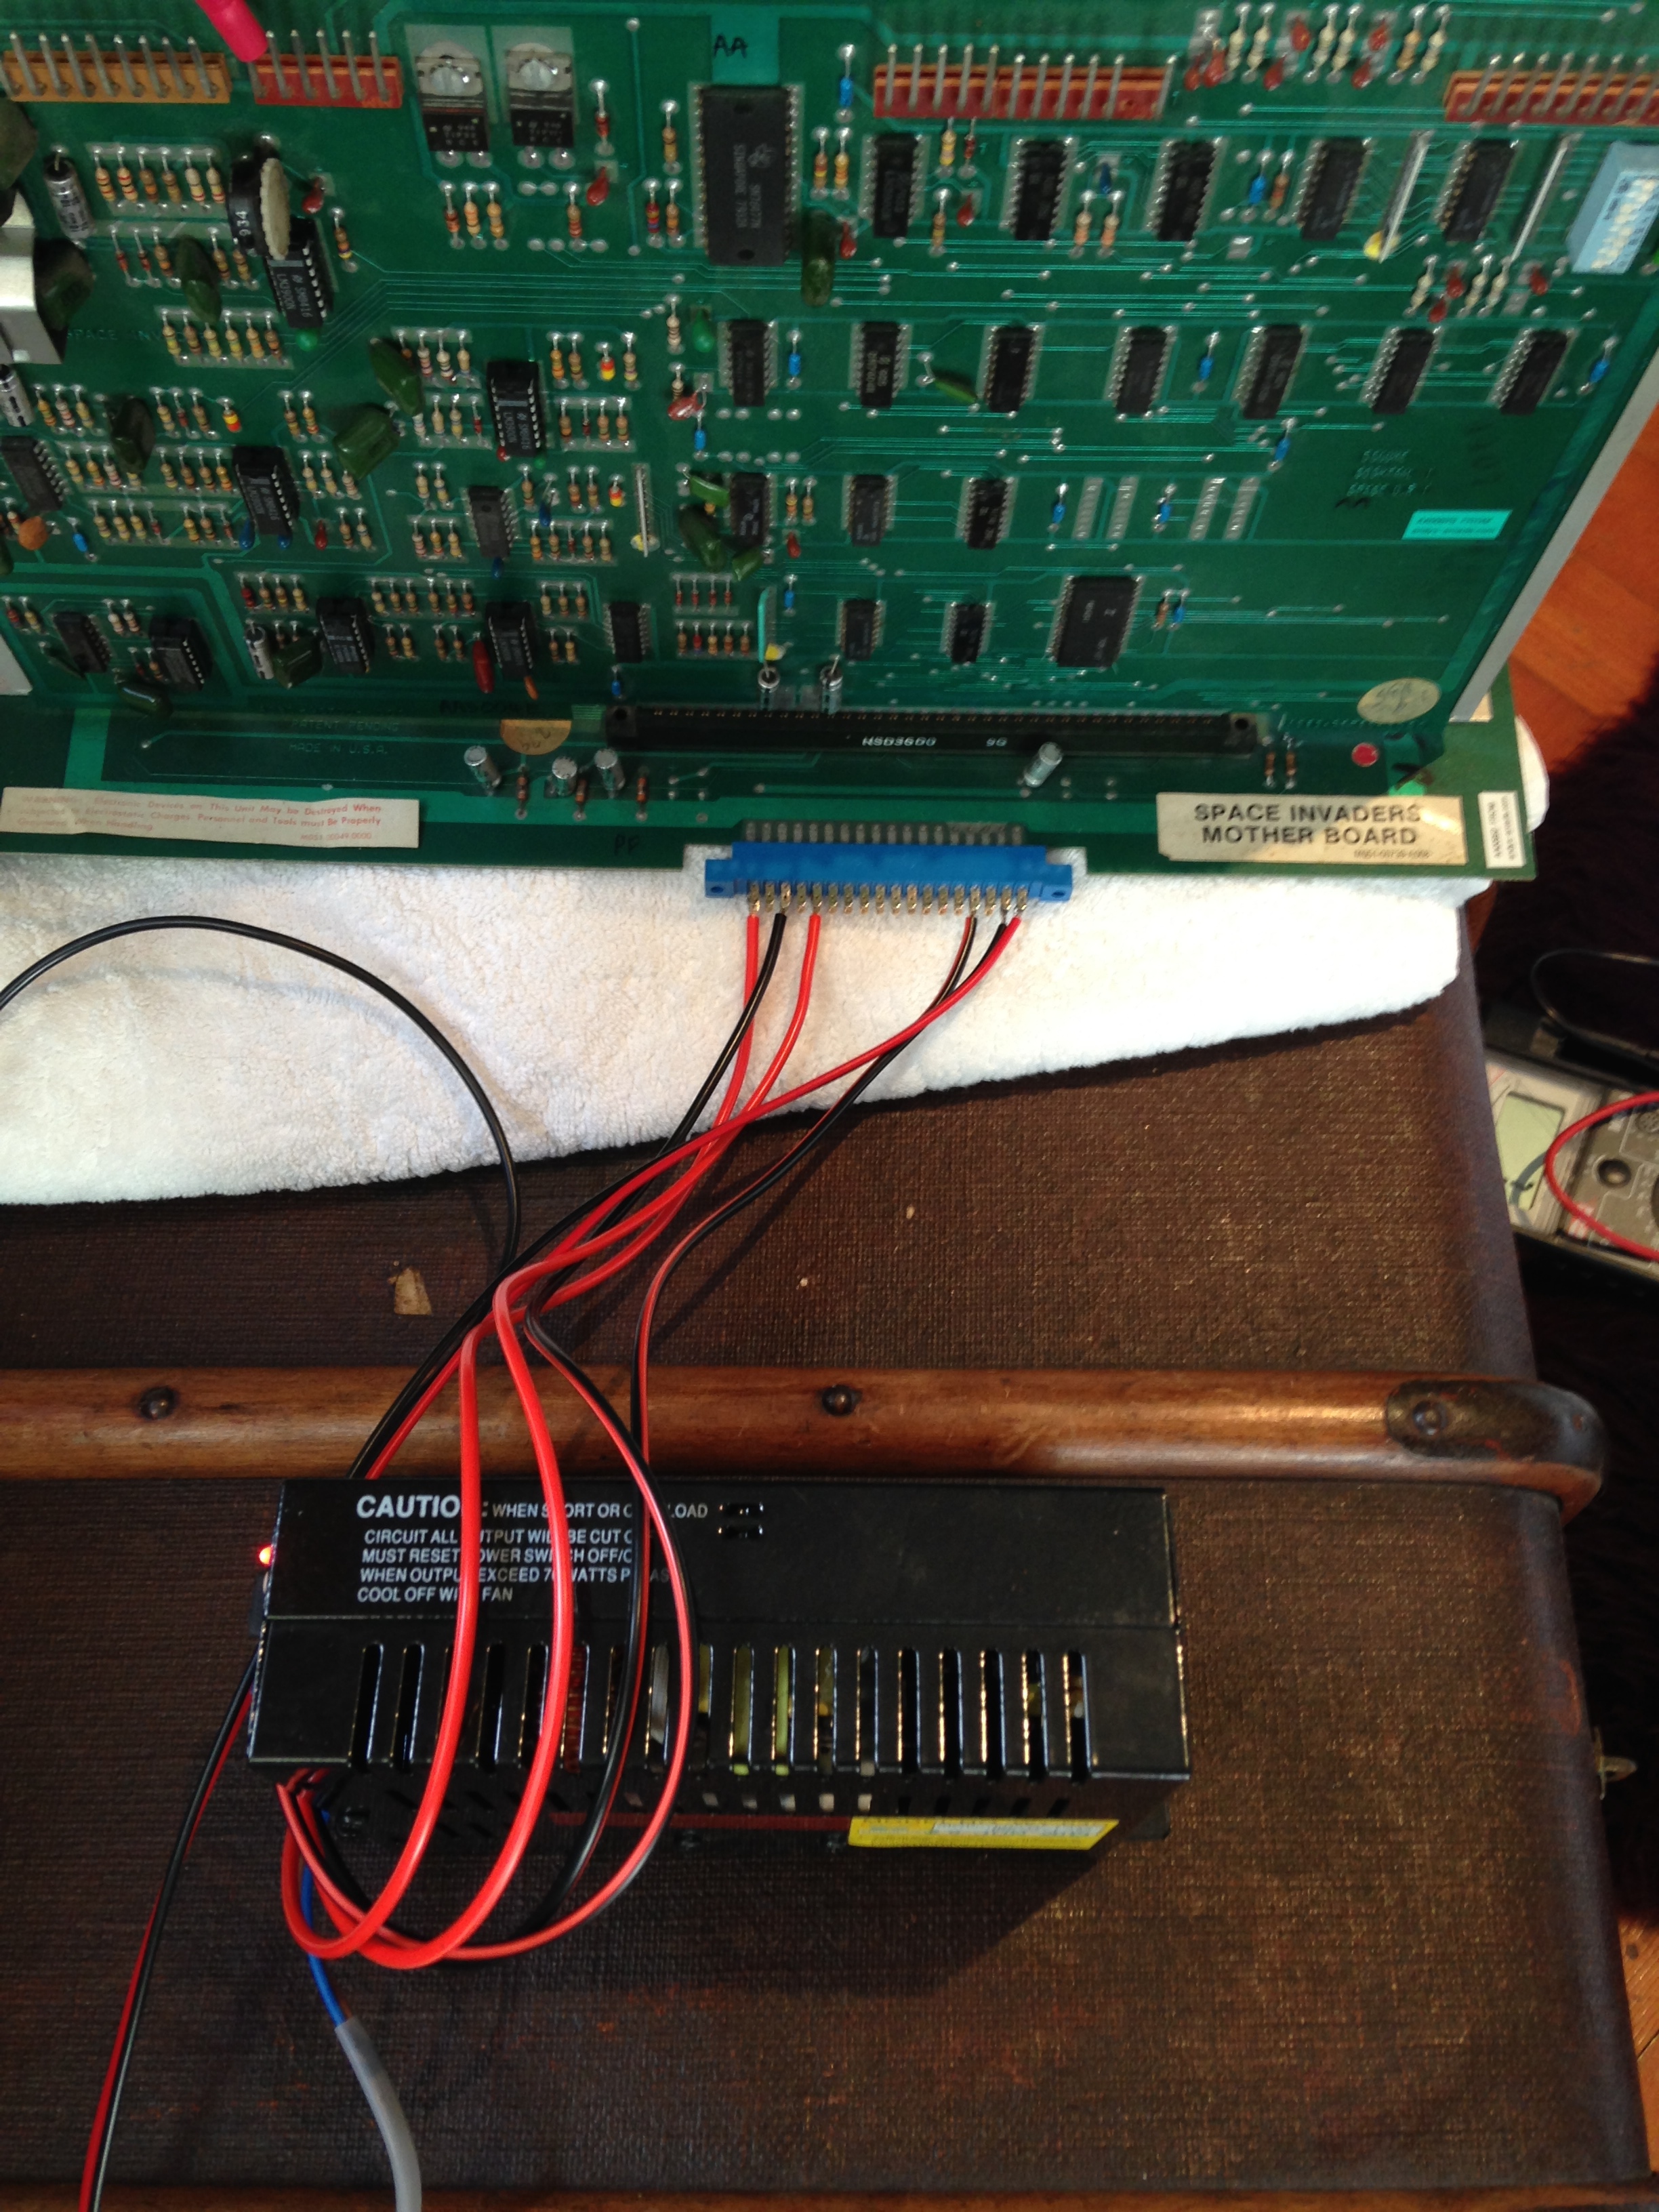
2. Wire up the Switching Power Supply
Initially I wired my adapter to a Jamma fingerboard for use with a Jamma Super Gun, but because all of the Super Guns I have are powered by PC ATX Power Supplies, these no longer provide -5V which Space Invaders actually needs to work (apparently ATX faded out having the -5V a while ago, even though it is still in the original wiring specifications)
Therefore we get a very good value Wei-Ya switching power supply from Huai I Electronics Co. Ltd and wire up the +5V, +12, -5V and Ground as well as the two Neutral and Live power lines for AC power.
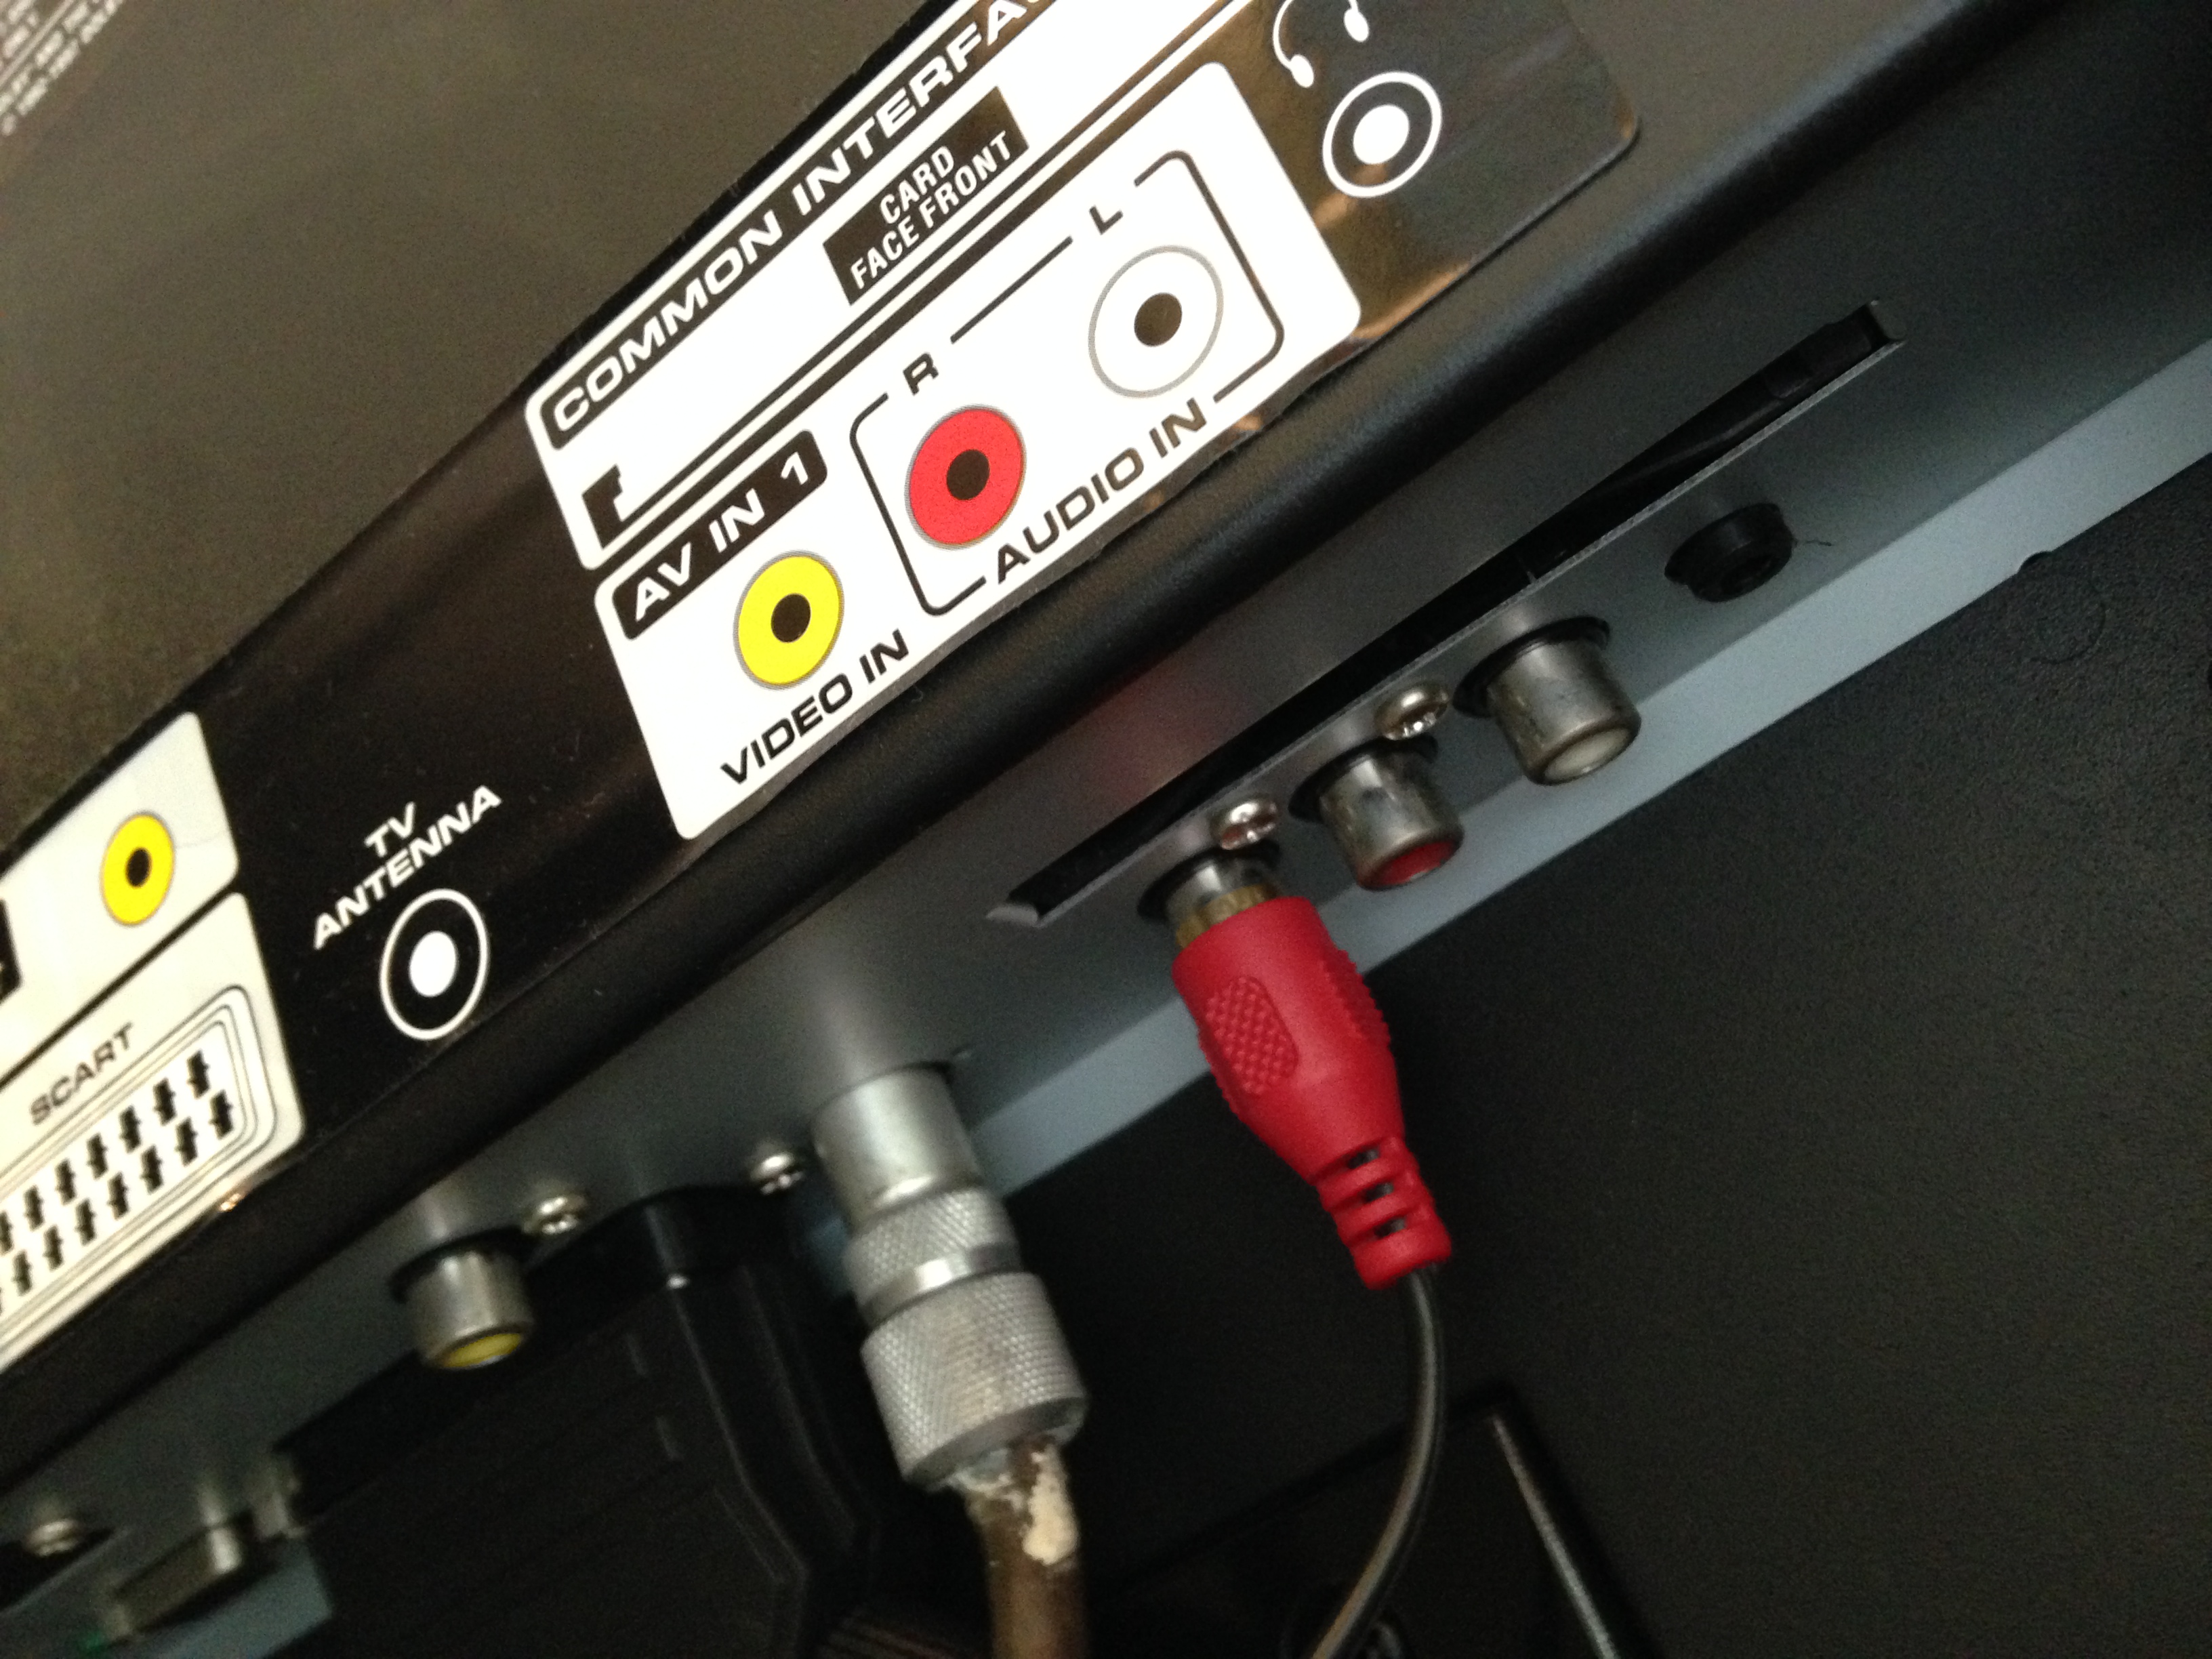
3. Connect up our ‘phono’ plug to the Video input of our TV
Even though we are using an old phono lead with a ‘red’ audio left plug, this should actually be the ‘yellow’ video plug used by TVs so we connect our new plug as per below
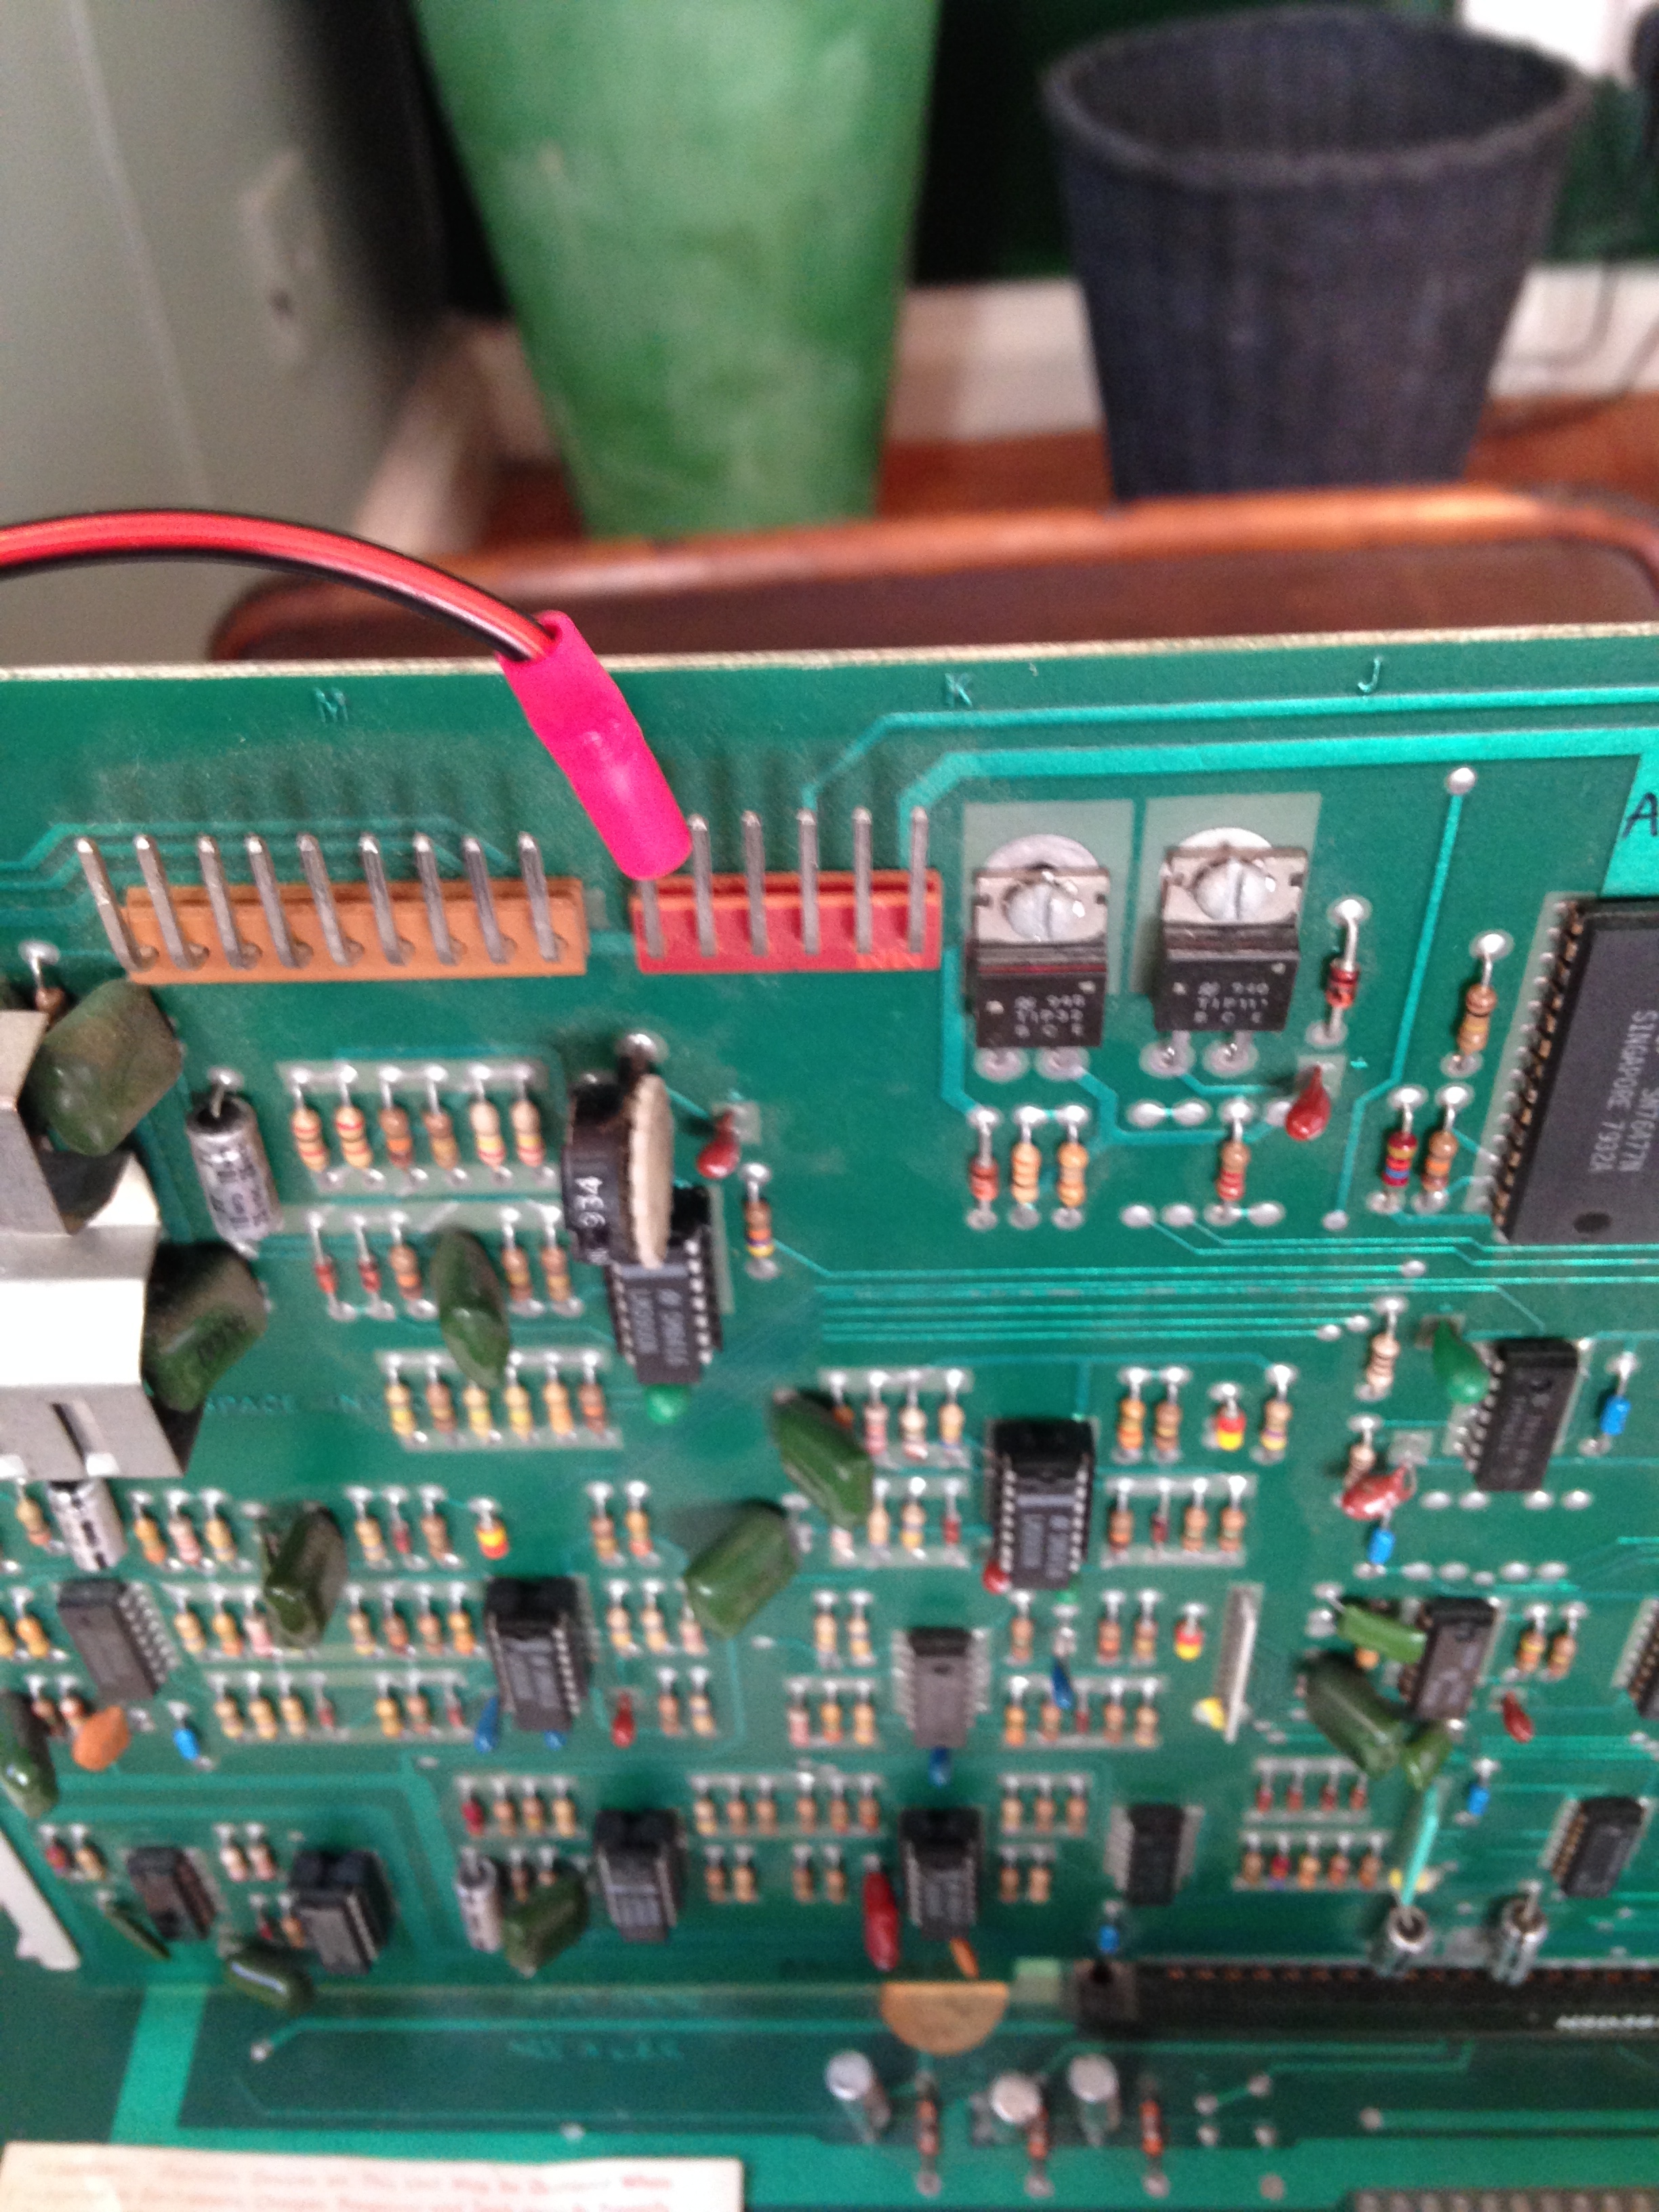
4. Connect our sound board ‘reset’ circuit to ground
This is where Midway Space Invaders Deluxe differs from Midway Space Invaders in that the sound board connectors are different sizes on the Space Invaders Deluxe in that the connections they are longer.
The 11/14 way sound board connector described for Midway Space Invaders Deluxe on Dave Langley’s site is actually 16 pins on the Space Invaders Deluxe.
The good thing, as long as we connect the connectors aligned to the right of the plug, then everything matches up (you can see that in this picture courtesy of the great guys at Elektron Forge)
So in order to ground our reset circuit (to allow the board to boot) we connect pin 6 (from right to left) to the ground of our power supply too – this is where the small shielded crimp connector comes in.
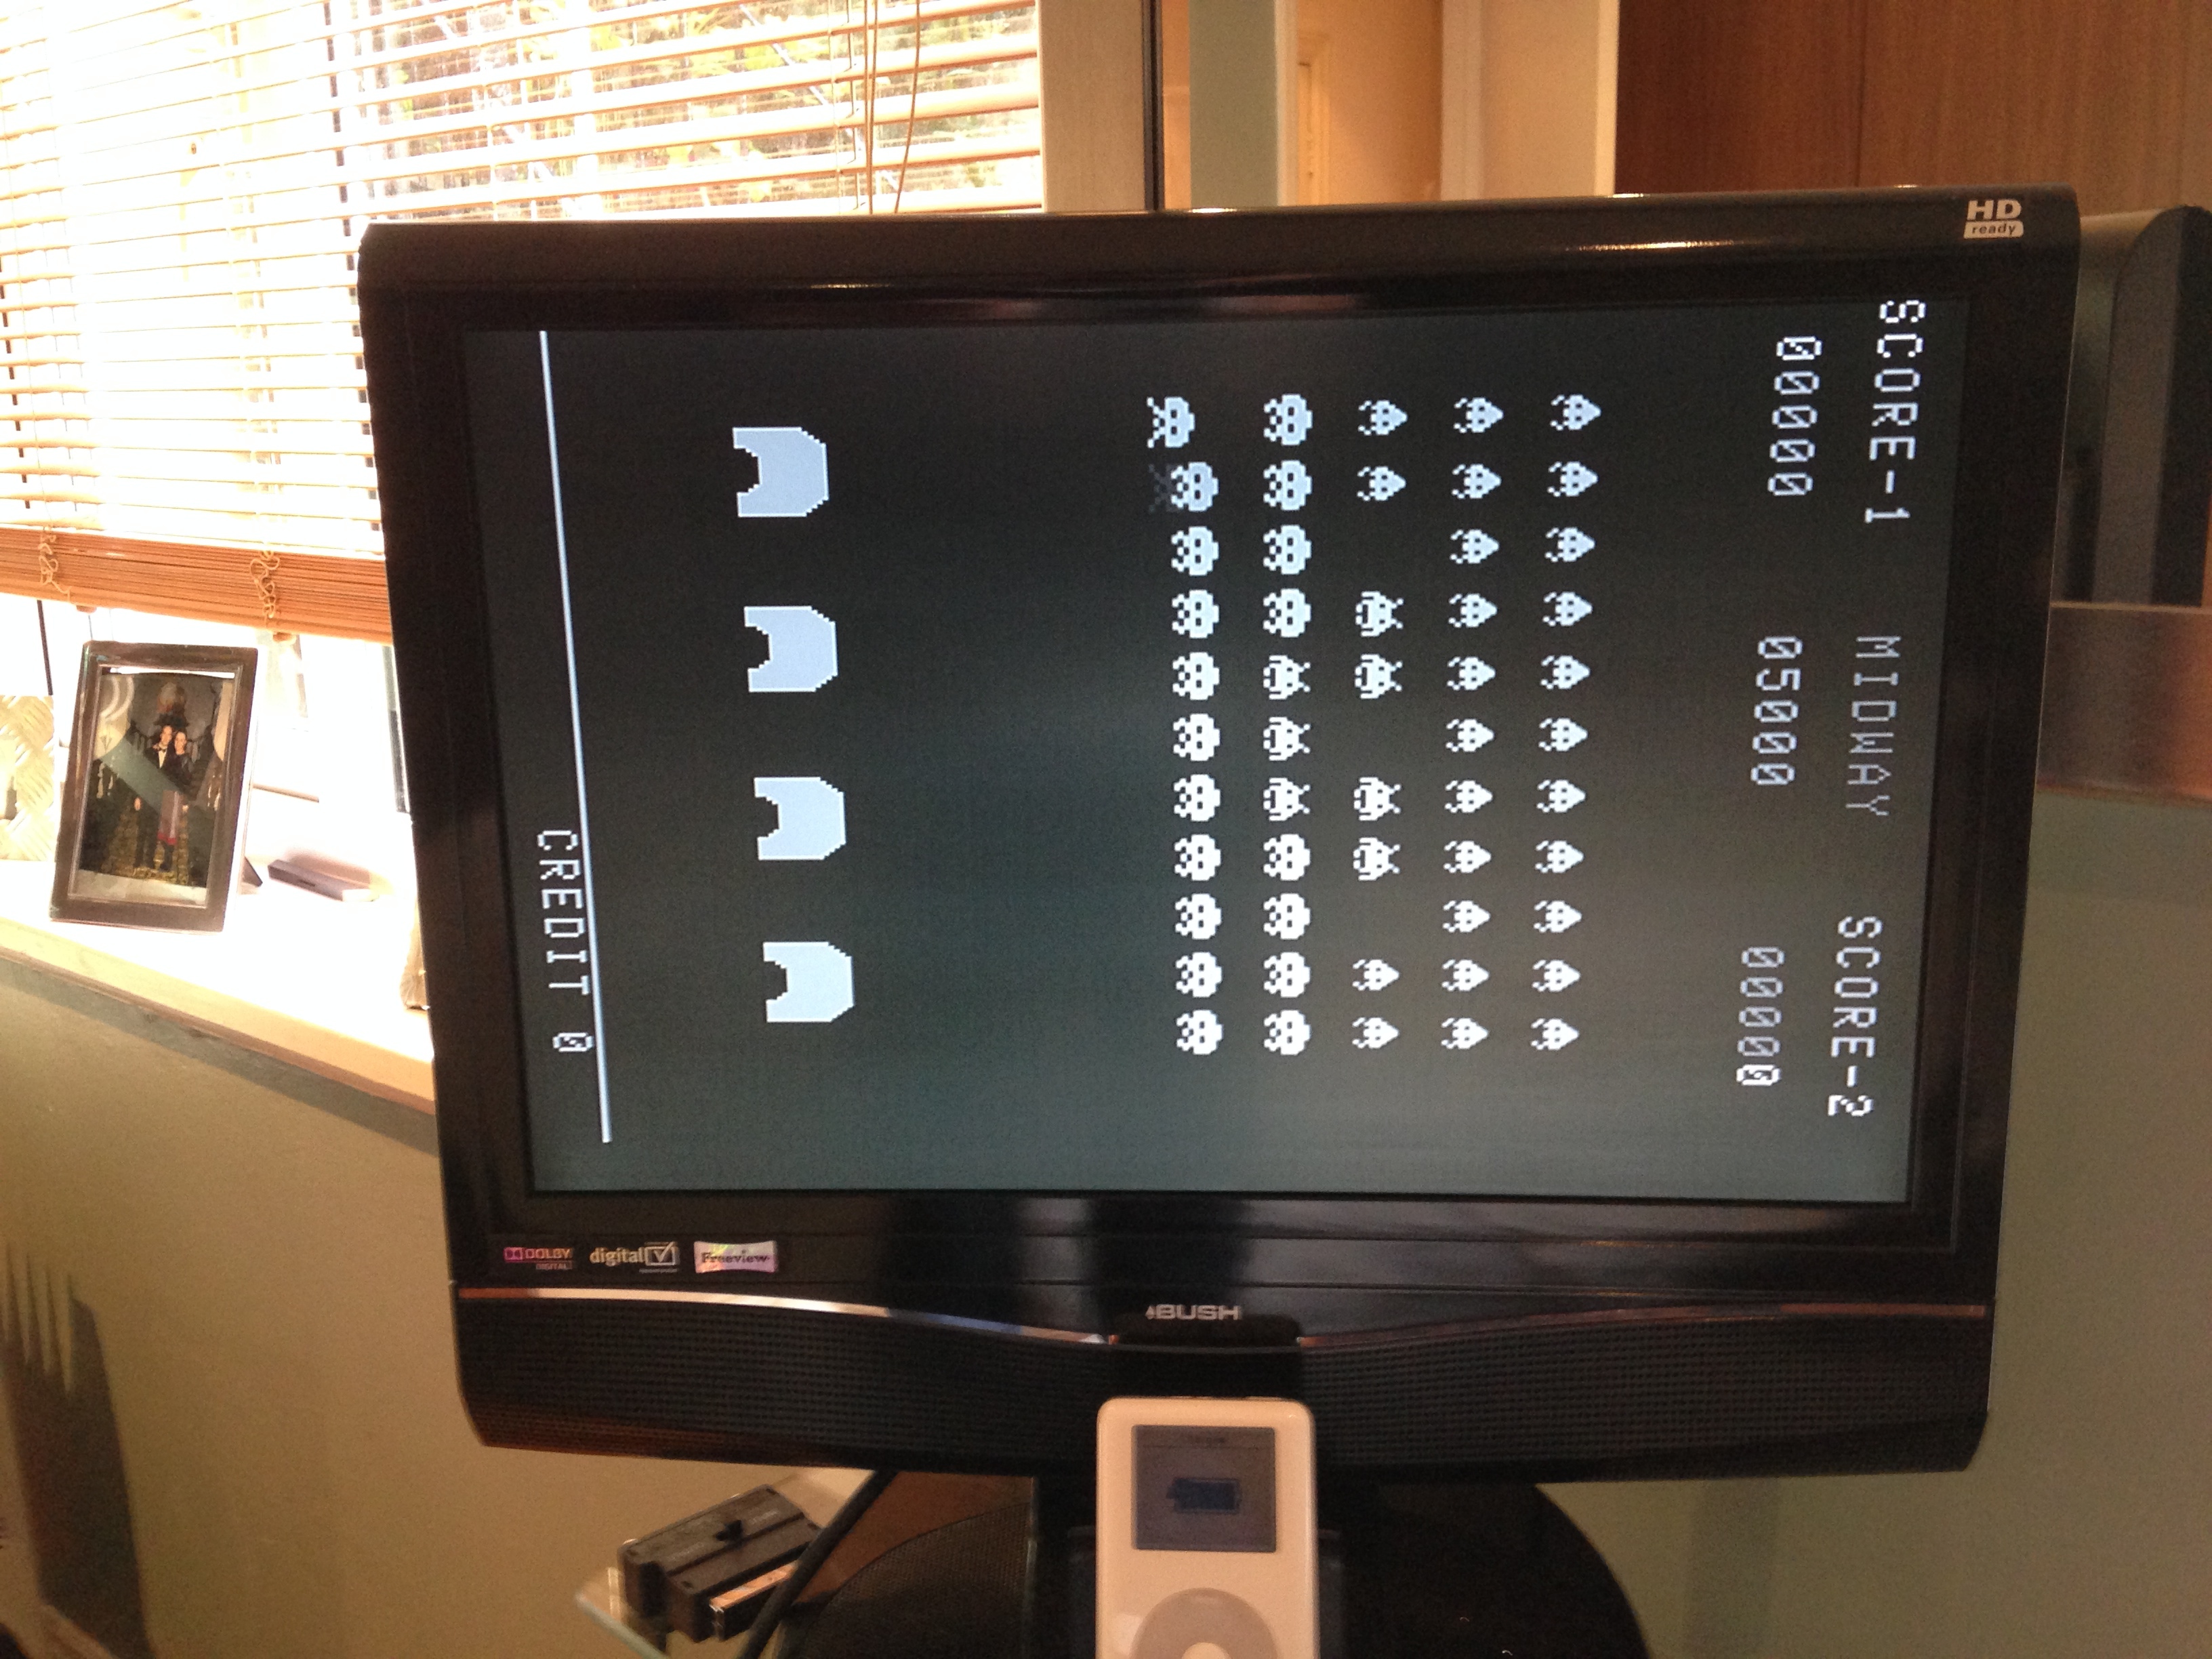
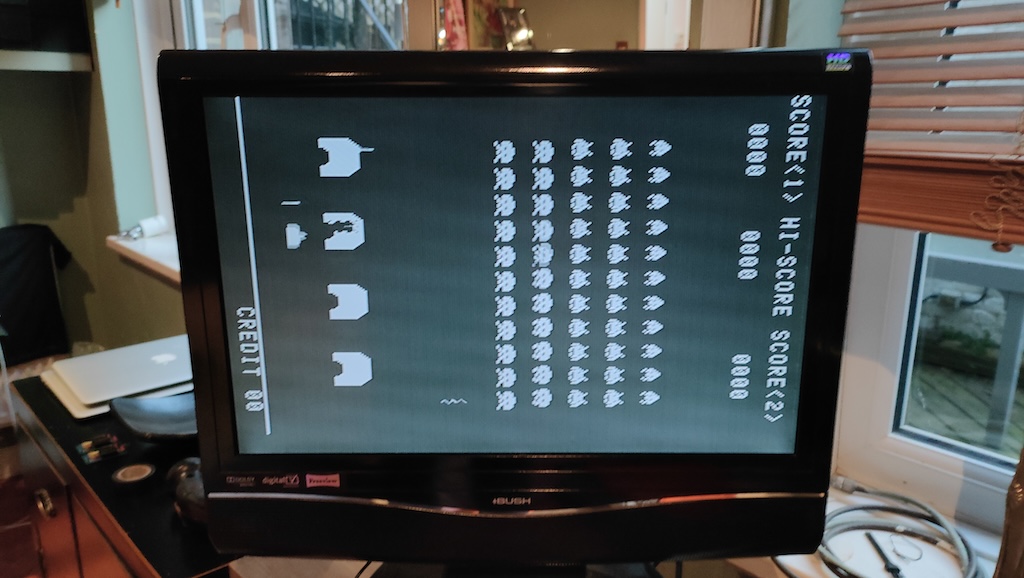
5. Check, Continuity Test, Power up and admire our work 🙂
I measured all of the voltages across the edge connector before I connected it to the boards (you can see how to do that at the reference site to Elektron Forge below) and then connected the 18 pin motherboard connector.
Again I verified it was all aligned up correctly by doing a multi-meter connectivity test of the edge connector to the 18 pin connector soldering.
Once we are all happy, power up the switching power supply and see what we get 🙂

Any questions you have post them up here and good luck with your boards!
References:
Dave Langley’s Midway Space Invaders pin-outs
http://www.robotron-2084.co.uk/manuals/invaders/midway_space_invader_pinout.pdf
Testing the Midway Edge Connector
http://www.elektronforge.com/testedgeconn.htm
Brent Radio’s list of everything Space Invaders – good for getting the Midway Space Invaders Deluxe wiring diagrams
http://www.brentradio.com/SpaceInvaders.htm
Update: 20/09/2024
Testing my boards again this time I built a Space Invaders -> JAMMA connector with a composite video output
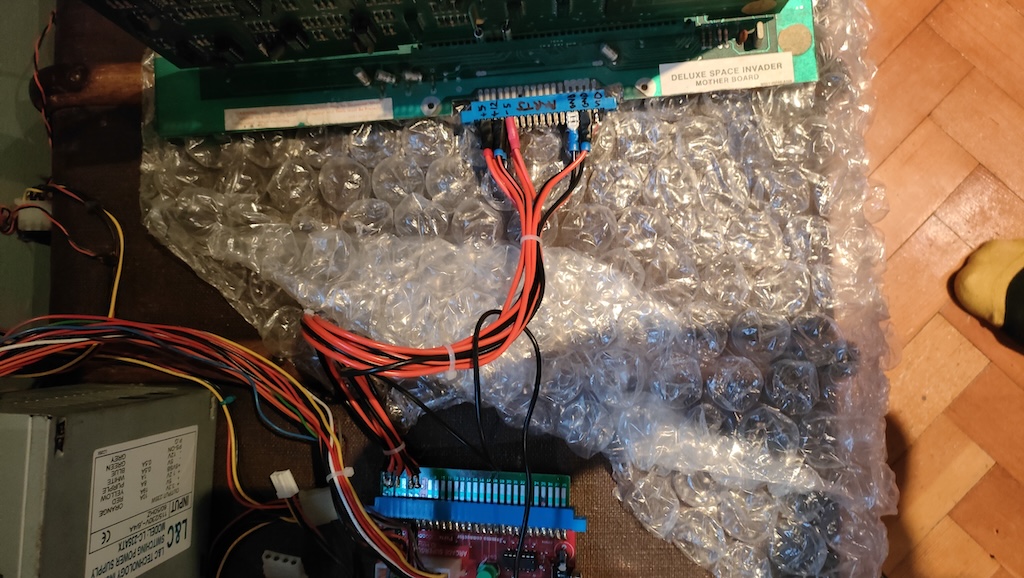
In order to satisfy the POReset input on Pin 6 of the sound board, we connect this to ground via Pin 10 of the sound board
and success we are up and running again 🙂
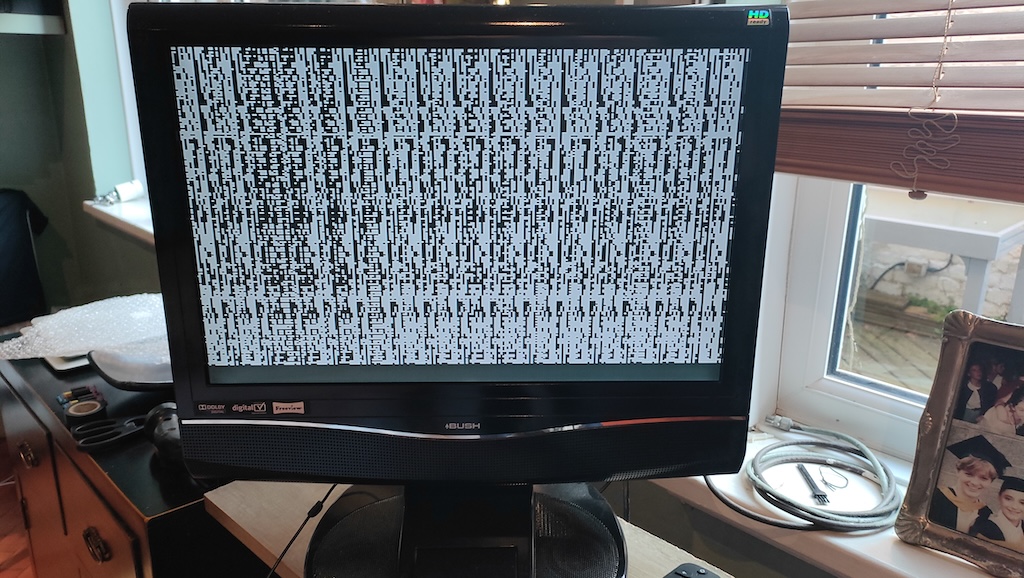
and for reference this is the output you get if you _don’t_ connect the Power On Reset connector on the Sound Board which I initially forgot to do!
Recent Comments